This blog uses cookies. By continuing to browse this blog you are agreeing to the use of cookies. OKLearn more. Other websites' cookies can also be placed on your device when you click on links, or share content on social media.
Welcome to my blog! I love beading and this blog is an attempt to share a few of my beady tries and things, thoughts and thrills and inform you about what's new (patterns, jewelry, etc..) I got hooked by the wonderful art of beading in 2004 and never stopped since then. I live in Switzerland, in a small town between Geneva and Lausanne.
This beading experience was one of the most satisfying (chaud) and frustrating (froid) ever. To explain this, I have to explain first that the batch of Permalux beads that I received from Preciosa Ornela in 2021 - ages ago - were the crappiest beads I've ever had in hands (they are not anymore, but!) I am a geometric beader at heart, and even though I tried very hard, I could not bead with these beads without the coating chipping off. It was a thick coat though, and the colors were splendid, so I was terribly bummed.
Preciosa said that they knew about it (ah bon?), that the problem had been
addressed (cool!), and asked if I could try to create something with techniques
that would not result in too much damage to the beads? 😒Apparently a question
of cost and time running out. I tried. After all, Preciosa make tremendously beautiful photos of beadwork. (on the right). But it was not fun. Beading has to be fun. It may be challenging, but not for this type of reasons.
Later, I learned that other
designers had received new batches to replace the bad one, and apparently they're much better, which is good to know.
But sometimes you need lemons to make lemonade! This is what happened.
Not wanting to keep these beads, I poured them one after the
other on my beading mat without putting them back in containers. I made
several things using coraling and fringing and the result was nice, but
it was not really what I wanted to make. However, I ended up with a most
delightful ocean of color on my tray and thought "gosh, if only I could
keep it this way".
That woke up the muse (fast asleep until then): Use Uncle Bob! The skull Ezra gave!!! Do like those who poor paint in water and tadam! Ooooh. That sounded exciting!
I had everything at hands to do bead mosaic but never really "dared" on my skull. "Something" was missing. Now I had the most delightful colors to create what I envisioned, and so I turned it into something I had never seen before:
Bead dipping!
And it was super fun!
My inspiration came from an advertisement by Mercedes Benz that I saw in 2014 or so:
For the note: the finished skull should be called "Beaders
Brain", but Uncle Bob is how my hubby called him years ago. Uncle Bob has made
many appearances at Halloween, and now we cannot call him differently,
even if he looks different now :) You will discover, if you read further, that he unfortunately doesn't wear his name well at all.
First I painted the skull with a special "concrete" paint. then I "mosaiqued" Pip
beads into flowers on the skull, which I painted gold.
Then, on the left side, I added 'gold' foil, crystals in settings, cup chain and
crystal mesh, to illustrate the left brain, the analytical and
calculating brain.
On the right side, I added glue and then rolled the skull in the beads, starting with the jaw first. Well, that went well! So satisfying.So much fun!
Of course, after I did the jaw, I saw room for improvement and that was to mix the colors a bit more and include tiny forget-me-not's, and then I rolled the entire skull.
There remained tons of little spaces to fill and I needed more glue (in a
syringe), tweezers and a looot of patience to obtain the result I was
after.
It goes without saying that I tried to add
huge crystals, and other things (flowers, etc) to the eyes, but that
looked really creepy! So I left them empty. One can imagine all sorts of expressions like this.
Of course I ran out of varnish when I needed it the most, because I was also running out of time. Bless the husbest who ran to get another spray.
I sent photos of the drying skull to Preciosa who said that they loved it. I wasn't sure so I preferred to ask. A couple of days later I posted my big box, which was quite an expensive matter, but in my mind, Preciosa's photos are worth an effort. With a sight of relief I now could lean back and look forward to seeing them.
But then............
The war in Ukraine broke out.
The box got stuck at customs.
I had given the correct TARIC number for a sculpture made with "other" materials but perhaps they thought that it was a real skull... It is a replica used for biology class after all, but still: the Swiss would not have accepted to transport it if it had been something not ok! They have "molecular sniffers" for this.
It took well 2 more weeks for this to be sorted, and so it didn't meet the deadline, but also, the advertisement team feared that it would trigger unhappy feelings and preferred to send it back without making photos. I explained that the whole project had nothing to do with death. It was a skull, ok, but it represented a beaders brain! I suggested making photos and let them sit in a drawer if needed.
Well, skull came back but photos never got out of the drawer - if they ever made any. I have no idea about this, they never told me. When they finally published the first photos of the campaign, it started with a sweet collection for children, and a lovely fairy-tale-themed poster gave me hope for the Fall, at Halloween.
When they posted their Halloween photos past year, it included
a skull, but not mine. I understood then that they wouldn't use it. December I wrote to them that without news, I
would publish the photos of my work in January. 3 projects that I cannot talk about is just too much! Even 4 considering some designs part of my Muserie Workshop! 3 months have passed, it's nearly Spring, the Princess Check Pouch has been published in the meantime, and now I need to move on.
I can make collages with my GIMP too! And even if not perfect, I am quite happy with my efforts. "Skull Stories" represents the idea that the skull landed on a pile of magical books amongst which one invited it to participate in various tales. It was an interesting exercise in using layers and transparency etc. It sure asks for a lot of time and in my case, starting over after too many errors, but I "got it".
Skull Stories
Skull design, beadwork, photography and digital composition by Cath Thomas
Image of burning flames and books by Mystic Art Design.
Image of globe by loulou Nash.
Image of palace by Dorothe. Image of merlin by gagagart.
Images of sitting and standing women by Dina Dee.
Attribution was not required, but I think that it is only fair to thank all these talented artists for their lovely work and their generosity.
And if you feel like trying some bead dipping too, I highly recommend it. It's therapeutic.
I made the photos below with my brand new light box,
In January I received a package with lovely soft pink and lilac beads from Preciosa's "Natural Colors" range, together with their Candy Rose beads. Preciosa asked the designers to focus on wedding and babies, which I did with happiness.
I made a Rose Walk necklace design with the Candy rose beads.
Preciosa published this design already some time ago, but I don't remember telling you about it on my blog. I don't remember well how I made it.
The soft seed bead designs have been published only today. I made 4 items for them:
1) a pair of bolas canastas earrings, for which I also wrote the instructions and which are now published on their website. Have a try at bolas! You can make so many things with this method.
I think that it is important to put beautiful toughts in our beadwork, so for this key charm, made for an old rusty key which. I thought of the very charming, old hotel where the love of my life and I had our honeymoon. I added a charm which says "believe in love".
I also made a baby rattle. I thought of a lovely FB friend, beader and designer who happens to love pink as much as me and who was pregnant back in January. I asked Preciosa Ornela to send the rattle to her for her lovely baby girl to enjoy the music. I think that it is important to show that we care when we have an occasion to do so.
Last but not least, to add a bit of magic, I made a sweet scent bottle, which is completely self-supported. It contains a cotton with a lovely Ylang-Yland and Blue Lotus essential oils mix. I believe in the power of flowers. Scents have magical properties.
What are the best solutions to store beads, components and manage work in progress? Vast subject. It took me way more time to write this article than I expected, because I found more and more awesome things to show and tell you. Take a bit of time to read it, I'm sure that there are things that you will like.
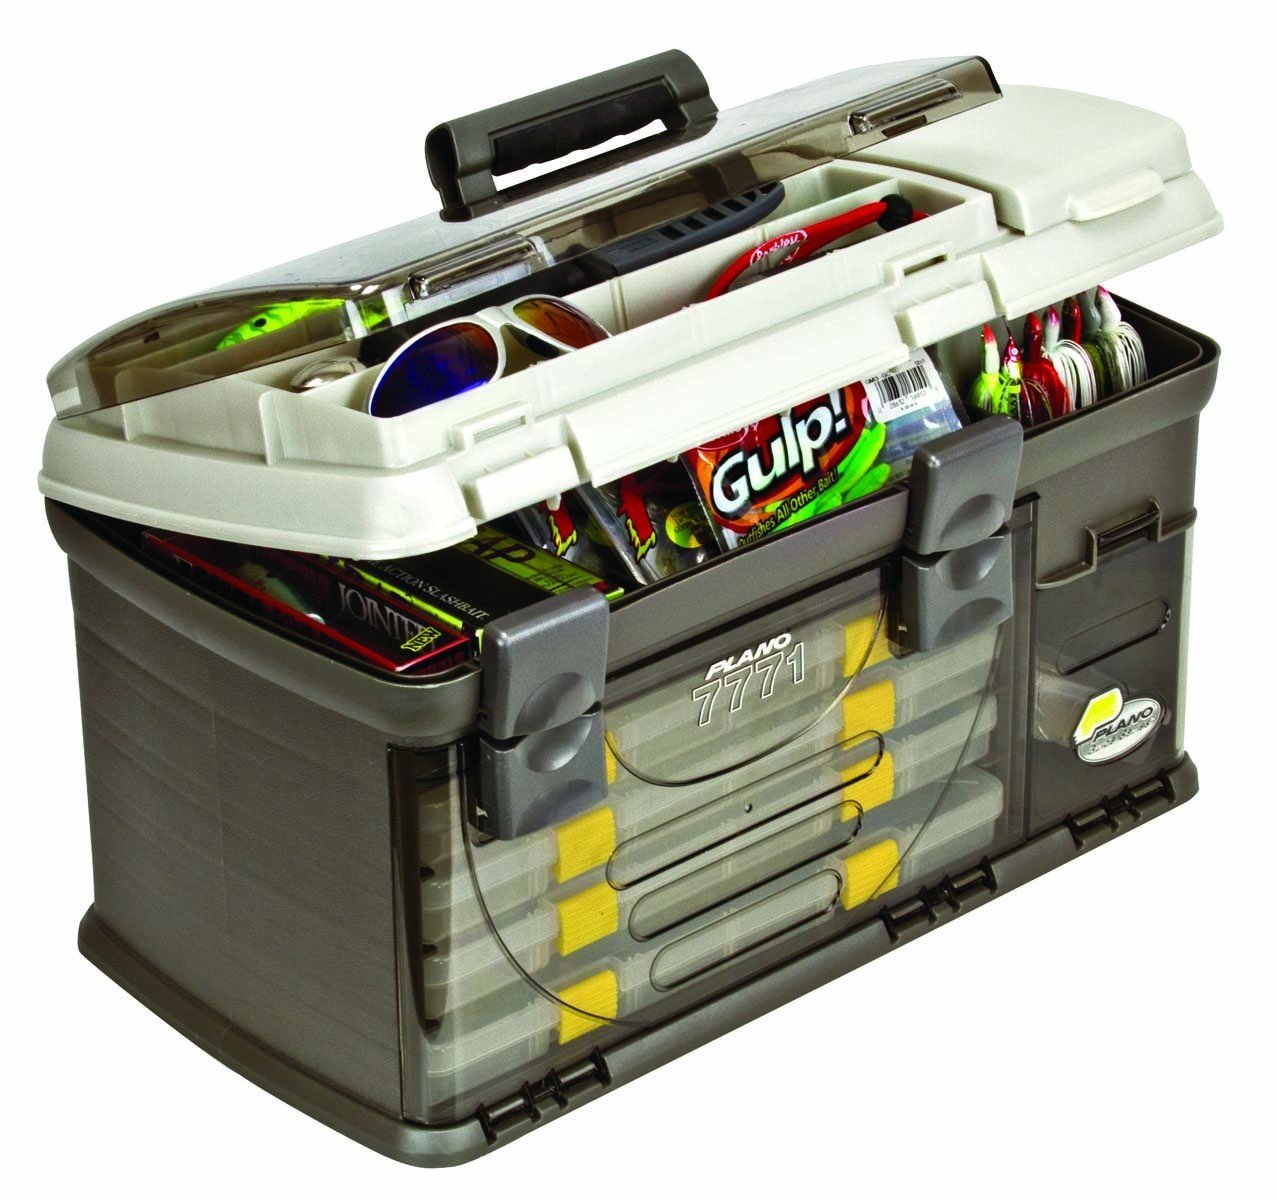
Plano Storage and Tool Box
If you don't have a big stash and only buy beads for specific projects once in a while, you need nearly nothing but a beading mat and a couple of drawers, and squat the kitchen or dining table from time to time. Maybe a Plano tackle system (a tool box with storage boxes for fishing) will be enough for you.
If your hobby gets more important, you may wish to dedicate more space to it.
What works for me doesn't necessarily work for others, but I asked my friends on Facebook what they like and dislike and it seems that we more or less use similar options. I hereby thank them all very much for their tips and advice. Of course, you'll find breathtaking solutions if you google 'best craft room designs', 'seed bead storage' or 'bead storage'. But read on, and see if my ideas, or maybe some of the ideas of my friends included in this article, inspire you!
Little note: even though my apartment may look like an extension of IKEA, I am in no way involved in their business and receive nothing from them (neither from anyone else). My opinion is entirely my own. Not necessarily better (or worse) than other suppliers, IKEA furniture is very affordable and easy to put together, and available nearly everywhere in the world, which is practical for you, friends world wide, who read me.
Trays with projects starting to pile up (on my previous beading desk)
My work space:
As a designer, I am a messy beader, because new ideas require immediate testing and hence more beading space. When things get too messy, my creativity suffers from it.
I already had storage for my beads and materials (and will show that), but my major problem was too many WIPs I didn't know where to put and so I needed to find a solution for that. Plus, the desk in the photo above had to go... (to make space for my birds). And to down-size is... quite interesting, I think.
My favorite plastic A4
boxes for WIPs. I have 12!
My "Smula" trayshad a place on temporary, loose shelves above my computer screen; and the number of projects exceeded the number of trays... so I was really happy to find flat, plastic A4 boxes for my WIPs on Ebay. They can be closed and stacked. I put beading mats cut to size in each, so I can bead directly on them. They are slim, but not too much: they can contain bobbins, XL-tic-tac boxes and tubes of beads, scissor, a little spoon... and a little plastic container for waste beads. The only minus is that the clips come off a bit too easily, but they're also very easily put back. I use them in combination with the Smula trays which have a very soft, rounded edge that is very wrist-friendly.
I love my Besta work station on wheels. So practical.
Can you see the trays and the pile of A4 boxes?
My trays and A4 boxes fit perfectly in my brand new "Besta" frames(one regular, and one TV unit) which is why I bought it. I added many shelves and could add drawers and/or doors. Besta offers great options to customize each frame. Julie Romero from Paris (FR) has an entire Besta wall and it is very beautiful (see a photo farther in this article). Many beaders say that Besta is the best!
My lap cushion (for key board or beading board), photo camera and computer are also in/on the Besta, practical for designing and tutifying. The best man in the world, hubby, put practical wheels under both frames.
Small make-up displays can
be handy "tool stations"
One tray is reserved for thread, spare needles, scissors, measuring tape and other little things I need all the time as a seed beader, but I left my other tools in an easily accessible place in my "storage room". Like Beverly Corbitt (USA), I like acrylic displays and turned two make-up displays into tool stations (see one of them in the photo right). If you like acrylic storage like this, have a look at what Muji has to offer (with thanks to Sarah Cryer (UK) for that good address).
If you use a lot of tools, a wooden beading station might be worth buying. Other idea: the modules made by the Poland-based firm HobbyZone might be something for you if you use pigments and glues or other materials for other arts of jewelry making, like paper beads, cab or stone painting. The system, designed for professional artists, can be completely customized and grow with you.
The "storage room":
Why a storage room? This room was my beading room, but my love was often alone in the living room and I needed to make place for some of my birds. When beady friends come to visit, a super practical "Norden" gateleg table still allows me to bead with them there. Below is a short video of how it looked when Esra was here:
My "storage" room can still be a beading and show room
with music by the birds...
The furniture:
First of all, when placing furniture, make sure that you have access to electric plugs, or use an extension cord. Despite making plans of all sorts with my computer (yes, really) I have moved my stuff around several times without success just because of electric plugs. If you plan to make some serious make over of a room, start with drawing the plugs first, together with the space needed for windows and doors, in particular if they open to the inside. Then cut out paper shapes representing your furniture and see how it fits in. It will save you a lot of time and sweat.
8-cube Expedit on wheels
An 8-cube 'Expedit' (IKEA furniture that got replaced by 'Kallax') stands in front of the window and heater. I needed something there to place a fan, a mirror, 2 camera battery charger, a humidifier and plants... Sometimes other things. Sturdy, heavy-duty wheels allow me to easily move this baby if needed.
It contains mostly cardboard boxes with finished beadwork, packing material, empty tubes, material for photography, books and mags featuring my work, fabric, etc.
Tip: when you buy boxes, make sure that they fit in. Here, two boxes fit in one cube, with a little space left on the side: just enough for the books and magazines, easy to take out without disturbing anything.
Silk, wool and fabric
Two 5-cube-tall Expedit shelves contain nearly all my beads, findings, other materials and tools. Two drawers contain materials for bead embroidery (Lacy's stiff stuff, silk, wool, fabric, leather scraps for backing, etc). I also have watercolors, a sewing machine and coloring pencils for fabric in there, among other things.
Small but stronger than
expected, Helmer fits in
everywhere, even
in an Expedit/Kallax
A computer with screen and all sits on an old Micke office desk. A matching drawer unit with suspended folders for papers serves administrative purposes.
In 2 'Helmer' drawers (photo left) are stored things that I use less: wooden beads, cords, wire, buttons, sewing material, glue, stationery, etc... Helmer have practical little wheels and space for labels. One of my FB friends, Aryd'ell Hotelling (USA) took the wheels off and put the drawers on a work table. Such a clever idea.
Remarkable things done by my friends:
If I did't have the Expedit already, I'd probably buy a Besta wall... orBilly bookcases. It is the sturdiest bookcase that I've ever seen, fantastic for heavy things like books beads. You can start with one case, buy another later, maybe more. You can add extra shelves. It is an IKEA flagship product, so you can count on them to make it for many more years. The structure is plain*.
Storage solutions aren't always sturdy: chests with (too deep) drawers meant for clothes typically aren't. And if "Alex" drawer units are shallow and have amazing success among crafters, Kris Empting-Obenland (DE) saw one collapse under the weight of her collection of lampwork beads. Kitchen drawers or antique printer's cabinets seem to be a better solution for that. Claudia Harberkost (DE) is überhappy with her 2 METOD cabinets with drawers. Note that in the USA, this series of kitchen cabinets is called SEKTION.
Elly van Buuren's Billy bead storage
Photo credit: Elly van Buuren
Elly van Buuren (NL) has transformed narrow Billy shelves into a dream storage for her beads (photo right). She hammered a gazillion of little lats inside the shelves for the box lids to slide on. A brilliant example of how boxes that fit well can change everything.
And below is Julie's beautiful "wall". The doors open and close by pushing them, so no handles are visible. She thinks that she is messy, so she loves her doors to hide it all. Can you stand the beauty of it?
Julie Romero's wall could be a great room divider too.
Photo credit: Julie Romero
Both solutions are so awesome that you may not even want to read the rest of this article (but there is more to discover).
Interestingly, simple shelves seem to not please as much as Kallax, Besta or Billy. I think that we like our things to be framed, somehow. But shelves can be very practical and tidy. Look at what Hilly Monzin (NL) did with very inexpensive shelves and plastic boxes.
Hilly Monzin's shelves are neat!
Photo credit: Hilly Monzin
My Maltese friend Joanne Zammit is very happy with the incredible amount of plastic boxes that her Trofast unit can welcome. It has many shelves and/or drawers (at choice) and is quite sturdy (it is "kid safe" furniture). Also, it looks the same on both sides, so it can be used to divide a room if desired.
* Note: IKEA furniture often has a hollow structure, which is ecologically responsible. It can be quite sturdy - my shelves are. But I can't hammer one nail in them.
Also I have no idea if the Kallax series is as sturdy as the Expedit - if you know, please tell me in the comments!
Now if you have a lot of space, but a small budget. Think craft room on a dime and be creative. You probably already have an old cupboard or shelves which can be recycled or transformed; if not, search classifieds in your region (click on this link, you will love what this woman did to create her craft room). See also how some old TV-armoires can be transformed into great beading stations. With doors that can hide your stuff in seconds...
And what if you have only very little space and don't want to monopolize the only table where you eat? Be inventive: with a bit of imagination you can create a lovely mini-beading station. Here you can see a very-little-space-requiring -portable nail art desk. Wouldn't it be nice for beading?
Portable manicure desk
Manicure tables come in many pretty versions and prices, but for beading you don't need a special acetone-resistant version with a hole in the center and vacuum aspiration (muse whispers in my ears that it could be practical for cut threads, and that the transparent acrylic shelves to see the colors of the beads through are fab).
Maybe you can transform a dressing table into a beading station.
10-drawer organizer in frosted white
(translucent drawers) not taking
more space than a basket or a plant
And have you noticed that many a tower of plastic drawers on wheels or utility cart has a top where you can put your beading board, mat or tray? One organizer, and you have a mini beading station in the room! (with thanks to Elisanne M. McCutchen (USA))
Don't forget to use a good beading lamp with a good daylight bulb or LED.
Bead storage:
Seed beads
My seed bead storage
If your LBS or online shop sells seed beads in tubes or flip-top boxes, wonderful! If not, you need to buy them yourself. Buy more than needed. Because even if more durable, tubes and flip-top boxes have a limited life-time too, and next time you order beads, you will be happy to have them.
A drawer with
a few purples
I had "bead towers" from the Beadsmith before, but out-grew them very quickly. The drawer with the purple seed beads shown left is one of the 'least crowded' drawers that I have now. My two units of plastic trays with all the tubes in them (in many sizes) is what works best for me sofar. It looks messy but it is vey practical.
Of course you can buy the awesome bead storage solutions invented by Elizabeth Ward, or thewonderful Bead Pavilion, with flip-top boxes. Quite expensive (in particular the shipping costs), but many beaders love it or dream of having an entire wall of those. I would love an entire wall too but am quite happy with my tubes.
60-tube rack - practical to keep the
tubes from rolling off the coffee table
Did you know that stores specialized in laboratory equipment have tubes in plenty of sizes, at a very decent price? They also offer racks for tubes. I use these racks when selecting bead colors and take them to the living room.
My seed beads are stored by color and somewhat by type: Czech, Japanese, Charlottes, cylinder, hex, etc, are all together in one tray by color, from size 15/0 up to 6/0, but the specialty seed beads are stored in XL flip-top boxes in another drawer (cubes, triangles, drops, peanuts, bugle beads, etc).
Small 17x10x2.2cm box for nearly
everything but seed beads
Tip: use the labels of the little bags for your tubes - my friend Marca Smit's labels come off like a breeze and I love that! but mark precious metal seed beads with a special mark to not confuse them with permanent finish metallic seed beads.
I avoid:
using multi-compartment boxes with only one lid for seed beads, it is a pain to take seed beads out of them, in particular in the corners. Sooner or later it ends up in a frustrating bead soup.
Other beads, cabs, crystals, focals:
Plastic drawers - 12 small
boxes fit in 1 drawer
Tip: Measure your drawers and see what size box fits best, and don't forget that you need a little extra space for your hands.
The small 17x10x2.2cm plastic box (photo above) is my favorite for everything small: beads, findings, cabs, crystals, etc. It has removable separations, to customize the compartments, so even long headpins fit in. I love that 12 of these boxes fit in one plastic drawer (photo right).
Fire-polished beads in small boxes
with practical individual lids
Photo left: I use smallboxes with separate lids for fire-polished beads.
For really large beads and focal components, I use bigger boxes, but again with removable separations.
The beads are as much as possible stored by type and size.
One-hole beads are separated from the two-or-more-hole beads.
Medium-size boxes with
Superduo/Twin beads with
removable separations
Gemstones have their own box, freshwater pearls have their own box, gemstone chips have their own box, Twins/superduos have their own box... etc.
Tip: use a little spoon to take beads out (and vice versa).
I avoid:
Hard plastic boxes which are not user-friendly, but very noisy, and easily breakable. Translucent boxes are often softer, hence gentler with your precious beads and crystals.
Oh, and don't put big beads in a flip top box. Let me explain: I have a big collection of XL-flip top boxes which can contain beads up to 12mm, but the flip top won't let them through so I have to open their tops. So I also have a box for the big beads.
Findings:
Large boxes from a hardware store
for large beads, focal and findings
I use the same plastic boxes for findings as for beads/crystals. Depending on their size, clasps may need mores space than ear wires, so, again, the removable separations are a must.
I store them by metal color rather then by type, in particular copper, because copper findings often come with brown anti-oxidation strips different from the anti-tarnishing strips that come with silver plated findings.
Tip: Keep anti-tarnishing strips in your boxes with your findings. Also, if you can make sure that it remains out of reach of kids, don't throw away silica gel sachets. Keep some with your findings and in your drawers, for they are great to protect your metal and finished jewelry from humidity, hence preventing rust.
I avoid:
Transparent pouches are wonderful
to prevent UFO's from invading us
storing magnetic findings (clasps) with non-magnetic findings, for the latter can become magnetic when stored in contact with magnets. It is better to store them in a separate box and keep them in their original package.
I also never store precious metal in the same place as plated metals; it would be a pity to mix them up. UFOs (un-finished objects)
We all make UFOs and sometimes we don't necessarily want to rip them off. My friend Darcy Rosner one day showed me her storage for her UFOs: hanging transparent organizers with lots of small pouches and I love this solution. You can find an UFO back at a glance. Mine are temporarily hanging from the side of an Expedit shelve in the storage room. I plan to make something strong to hang them onto.
Don't forget kitchen storage and organizers for drawers. Or spice jars and spice racks, other jars, the awesome magnetic bar for knives...
And did you know? that with ice-cube trays you can recreate some sort of printer's cabinet in your drawers, to store your findings and/or cabs/crystals/lampwork beads (idea found on this interesting blog).
Oh, and Angeline Yoshiko Leong from Malaysia reminded me of the Ferrero Rocher boxes. Double pleasure!
If you have a narrow room or long corridor, and no space for shelves, maybe you can hang nail polish racks on the wall that can hold lots of nail-polish bottles beads. Or hang it behind shelves serving as room divider? Or a smaller rack on the side of shelves. Maybe you can assemble two, put them on wheels and use it as room divider? Store it behind a cupboard?
And if all this doesn't inspire you, perhaps scrapbooking hobbyists will, with their scrapbooking stations or armoires...
 This beading experience was one of the most satisfying (chaud) and frustrating (froid) ever. To explain this, I have to explain first that the batch of Permalux beads that I received from Preciosa Ornela in 2021 - ages ago - were the crappiest beads I've ever had in hands (they are not anymore, but!) I am a geometric beader at heart, and even though I tried very hard, I could not bead with these beads without the coating chipping off. It was a thick coat though, and the colors were splendid, so I was terribly bummed.