 |
| Yukka flower with cubic zirconia |
So for the IBW 'year-long-bead-along', I had other hair accessories in mind: hair sticks. Flowers in 9 colors to match any outfit, with a zirconia in their center... awesome sauce.
I planned to use the remaining 3 green colors for petals. Perhaps you remember me asking in the IBW FB Group for the colorful IKEA chop sticks that were out of stock world-wide? I finally found colorful plastic chopsticks for kids, but not in all the colors. In the photo on the right you can see an attempt with January's purple flower, using green "petals" for the end cap. I don't like it. It did not turn out as I hoped it would.
 |
| Hair stick made with a chop stick |
Then I thought of making 2 barrettes, but the weight factor indeed became an issue, and the flowers slipped on the barrette in every direction. I struggled with their unwillingness to stand tall, and the flowers were too close to each other, which looked unattractive. It didn't do the lovely swirls justice, and ruined the rainbow effect. That actually didn't encourage me to make a tiara, and I felt a bit disheartened.
But in May, a real-life fairy tail happened: a beautiful girl from California became a British royal princess, and while wondering what to do with my flowers, my FB news feed got flooded with photos of tiaras. That pulled the trigger: I had to make that tiara I imagined with my swirly flowers and find a way to have them stand tall... As you may know, I believe in signs from the universe! And I think that I did well, because
It worked!
Here is Anthea's Tiara
Here is Anthea's Tiara
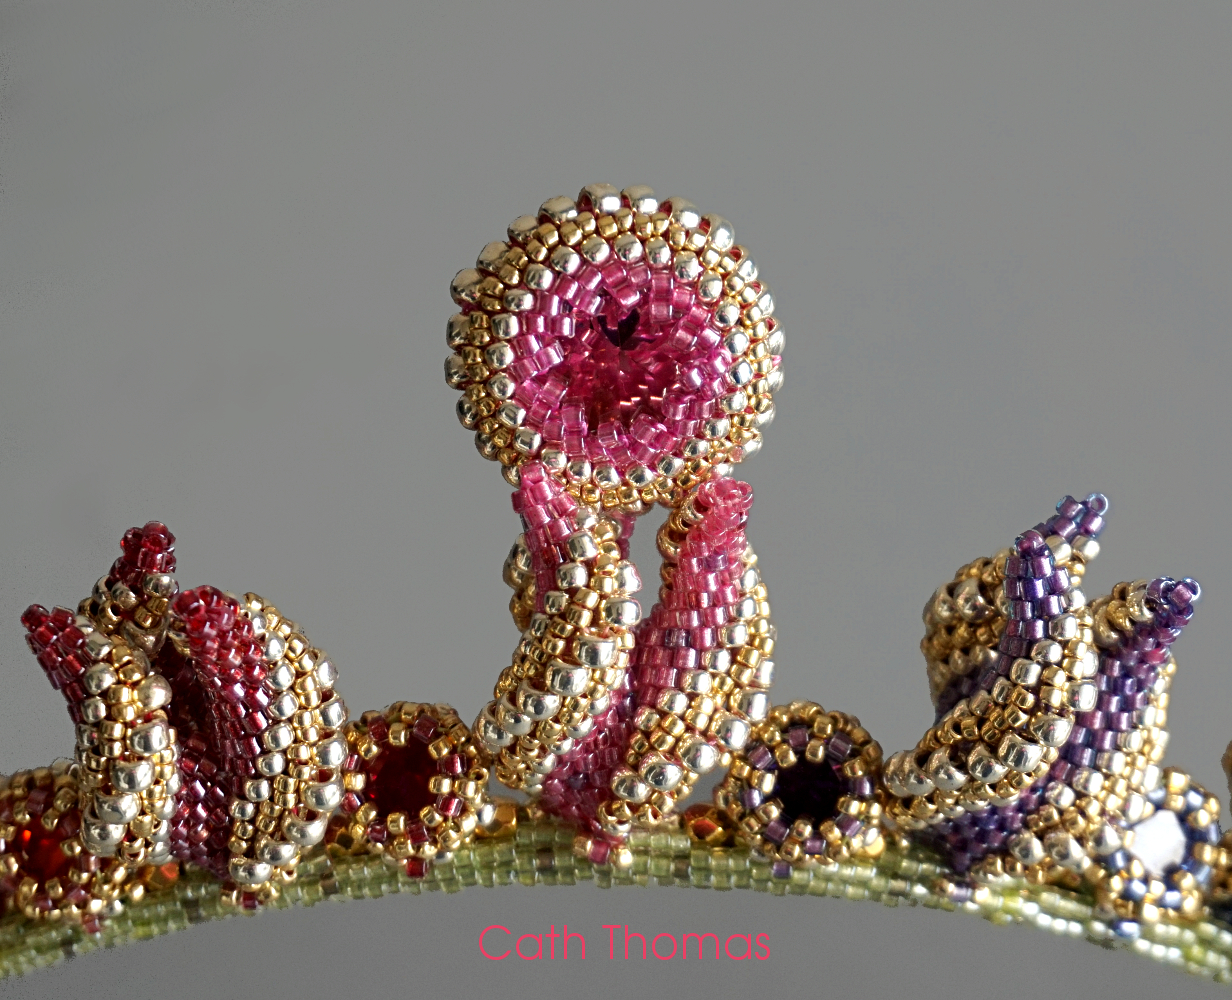
 |
| Anthea's Tiara - front view |
Upon suggestion of a Facebook friend, I kept the yellow flower with its rebellious swirl. I like that it shows that the flowers can be made with the swirl in the opposite direction. Somehow it balances the whole. May's malachite, June's olive and July's peridot can be found in the little bees, and the beads used to cover the diadem and to make the little petals (on the sides, and as bee wings) are July's too.
 |
| Anthea's Tiara - back view. I love zirconias because the light shines through |
It sits really beautifully on top of the head, as you can see in the photo below.

Why Anthea's?
In Greek the name Anthea means: Flower; Lady of flowers. In Greek mythology, it is one of the names borne by goddess Hera, who received a garden from Gaia when she accepted to become Zeus's spouse. The guardians of this garden were the Hesperides, the "Nymphs of the West" (where the sun goes down or Evening Nymphs), believed to be the grand-daughters of the Evening star. Their number is unclear. The Evening star is nothing less but Venus in our constellation, and Venus is the goddess of love.
 |
| Hesperoyucca whipplei or Western Yucca |
Because I named my 'Yukka' flowers after the Western yucca flower (hesperoyucca whipplei) just before opening, I think that they represent the Hesperides well;
Because my muse obliged me to use the remaining, but larger pink ice CZ left in my stash by hiding my 8mm, suddenly Venus as the Evening star was beautifully represented too;
And because a garden needs bees, I made two earrings representing little bees;
The whole forms the beautiful rainbow.
It feels amazing to wear.
It feels amazing to wear.
Do you think that Hera would wear it?
Making of the tiara:
I used only beads, thread, zirconia and a metal diadem base. No glue and no fabric.
 |
| 8mm zirconia in flower |
 |
| bezelled 8mm zirconias |
 |
| Bezel before adding the zirconia |
 |
| Bezel after adding the zirconia |
About the Cellini peyote bezel - this pretty technique gave me plenty of new ideas, like a bigger bezel for a tape measure, beaded beads and even a rope - doesn't it look pretty? I wanted to take a break after all that I have made the past months, but Eddy won't leave me alone :D, so I created a Facebook group to share our mutual passion for this stitch.
I put everything on the diadem with the combs "to the bottom" as if it was to be put on the head like a crown, but this resulted in combs pointing towards my front. Although this probably is technically incorrect, it appeared to be the best thing I could have done: the weight of the beadwork leaning to the back somewhat pushes the combs to the front, and it remains in place. It sits perfectly well on my head. If I had mounted the piece with the combs pointing backwards, the combs would slip out of my hair and the tiara would certainly fall.
Because so many happy coincidences made this piece come to life, and better then I had hoped for, it makes me believe that something out there wanted this to come to fruition. I call this "beading with the Universe". I love it when that happens.
About the Yukka flowers pattern: you will find a new, improved pattern in my Indie shop.
So log in, and download the new version! Contact me if you need help.
And join the Cellini Peyote Freaks Group!

Thank you for reading and for beading with me!
Cath
No comments:
Post a Comment
Your comments are welcome!