This blog uses cookies. By continuing to browse this blog you are agreeing to the use of cookies. OKLearn more. Other websites' cookies can also be placed on your device when you click on links, or share content on social media.
Welcome to my blog! I love beading and this blog is an attempt to share a few of my beady tries and things, thoughts and thrills and inform you about what's new (patterns, jewelry, etc..) I got hooked by the wonderful art of beading in 2004 and never stopped since then. I live in Switzerland, in a small town between Geneva and Lausanne.
I realize that I haven't been very active on my blog, but that's because I couldn't. My latest makes were long-lasting projects, like the Prince of Wales inspired pouch for the Beadworkers Guild journal, which took forever. My entry for their annual challenge even longer. In fact, I am active on my blog, busy writing my blog post about the challenge, but you can't see that, of course. I did a little bit of something in between to not feel like I never achieved anything, and I thought that I should share these 2 designs with you.
This lovely embroidered Cherub pendant, finished just in time for Valentine's day, was made after attending the bead-embroidery-themed 'Meet, Mingle & Make' Zoom meeting organized by the Guild. It was a lovely day beading together with friends. There were lovely patterns available, but I made my own thing based on a design by Diane Hyde, from her book "Break the rules", whilst learning many more things thanks to the workshop tutors.
Bead embroidery can be time consuming, but this was not too long a make, in particular not compared to the above-mentioned pieces. What takes the most time here are decisions about which bead and what colour would be best.
I wanted to make a different fringe, but didn't have enough fire-polished beads in 3mm madder rose. That is also the reason why I made the matching earrings with bi-cones. If I can find more of the fire-polished, and the result is as I envision, I will post it to show the difference.
Although I was completely exhausted when I
finished my challenge entry, my fingers wanted to bead after two days again. I
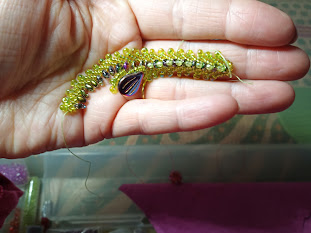
decided to make a Diamond Weave rope sampler. It is a two-unit wide
rope, that includes the basic stitch and the 10 basic variations, just
to see how good or bad these would look made with seed beads. As explained in the book, basic DW and most variations don't look so good when there are no thread-cover beads to stabilize the structure.
It's not super attractive, but I like it. It's an interesting piece to keep for reference, because it also shows how many units are needed
for an inch of length. I separated each portion with a gemstone. There are many possibilities to play with. The
last 3 portions are my own alterations and tbh, I love the 'plume' at the bottom. And it sure reassured me that I am not a slow beader, because I made it in one day.
I bought / tested something new: a light box, or what they call a portable photo studio. I love it!! I wish that I had bought it 10 years ago! No more waiting for clouds to go away, always ready even at midnight thanks to the led lights, great back grounds... but most of all nearly no more photo editing! The above image was made with a very ordinary Gigaset G4 mobile phone, and I only cropped it a bit. It's amazing when a camera doesn't need to increase the light exposure - with the ring of LED at the top, this box offers various light and colour intensity, which is great.
I can only recommend the Puluz 40x40cm with ring light. Below more photos of pieces that I re-photographed before sending to the UK for the Guild's beautiful "Purple and Gold" display. I used the grey back ground and medium white for all the photos.
Above, left: Mermaid Tail, beaded beads: 1 slide, 2 cord ends and a
pair of earrings. Right: a long Bola Canastas with a Mermaid Tail bail, eg. the beaded bead reversed. I love it!
Purple is one of my favorite colours, but so hard to do justice. I always had a huge amount of work editing images because of the lack
of light, in particular with purple beads, and often the result was still not as wished. Well... this new tool is a wonderful
change!
Above, left: Cellini Ribbon earrings, as per my masterclass tutorial, or my Day and Night necklace. Right: Tulyda necklace - with my Lyda chain and a modified version of the Tuya Tassel (part of the Day
& Night necklace design) to include a rivoli at the top. When placed on a display of this kind, I always had issues with the camera, no matter which camera. Here, there only is a slight lack of light at the bottom of the bust, which can be compensated with an extra little lamp at the front.
And of course I included the Muserie necklace. Such a pleasure to wear. I've finished the first part of 3 tutorials for my Muserie workshop and those who attended it know how much work went in it already. The 2nd and 3rd parts will need a bit more time, but I am sure that you will love all.
Now you will all have to wait until May to read my long long long blog post about my challenge piece. I can't wait to show it to you. I'm truly happy as can be with it.
I haven't written on my blog since July... I think that it's because I had to remain silent about too many things - beading for Preciosa Ornella, for the Muserie workshop and this project, which all took an awful lot lot of time.
It is hard to keep secret so many things you love. For this project, I also would have loved to vent while making it, because many things went wrong. But first the reveal - I'll explain more about the making of this piece below.
I am really happy and proud to present to you my "Princess Check" pouch, that you will find in the Beadworkers Guild Journal this month.
Princess Check pouch and bracelet, earrings with houndstooth motif and beaded bead with random motif and tassel
I made the bracelet and earrings with Miyuki seed beads, the pouch with
Toho seed beads, and I would warmly recommend Matubo seed
beads, for the more consistent the
beads, the better.
It's been a long time since I made something with the Diamond Weave,
here the Waffle Weave technique - variation 7a on page 129 in the Diamond Weave book. I had the obsession of making a Prince of Wales-inspired
beaded fabric ever since I designed the "Hello Sweetie" bracelet for it
(page 131), but my heart and hands were not able.
Also, if the
houndstooth pattern is rather easy, the full Princess Check pattern is more
difficult, because it changes nearly all the time.
Princess Check pouch with matching bracelet
When the delightful "micro crystals" hit the market, and the theme of the Journal being "Black and White", I knew that I had to make it. Photos do not show how beautifully these tiny faceted crystals sparkle. I knew right on that it would be the perfect bead for the "overcheck" in this beaded fabric. It was difficult to not make a colored overcheck (it is really calling for it). I hope that you will make one with beautiful emerald or ruby crystals.
I started by drawing the diagrams. I had to start these over several times according to the evolution of the proect. I started beading on the 7th of August, right after the International Beading Week events. I love to BOTB (bead on the balcony) in the Summer.
But things did not work the way I expected. I had to rethink the entire making of the beaded fabric, to have a beautiful drape.
I made a short video to show how very supple, soft, and delightful to touch this beaded fabric can be, and how the small crystals shine.
My friends know that I make 15 mistakes in 14 rows of beadwork with motifs. Fortunately it is super easy to unbead DW. I made a short video to show that too. It really makes a difference for me. I have a degree in frog stitch, hahaha.
I wish that I had made purses with fabric before trying this with beads, but alas. I often learn things the hard way. This pouch was initially meant to become a purse, but the purse frame that I had bought not only needed many more side panels to open properly, it also was not available anymore when I searched for it again.
Purse with metallic frame
So I had to find another option and together with the lovely
editor of the Journal, Rowena Henderson, a pouch was decided. Any pouch can be used. You don't have to
make it exactly the same size - the project allows to add more columns and of course more rows to the fabric. Less is possible too, of course.
What is certain is that if I made a handmade silk pouch for the inside,
it is because I had finished the beadwork already. I highly recommend simply
adding your beadwork to a readymade pouch. You can cover anything with a fabric like this, even home decor.
HRH Edward VII
This project is dedicated to the British monarch who my muse - Eddie -
is named after: Edward VII. He was a real trendsetter, and he adopted
the existing Glen Check for leisure wear, altering it with an overcheck. It is named "Prince of Wales" after him and not his grandson, as is believed by many.
The latter, however, contributed to making it an immensely popular
weave and ever since, princes and other remarkable people sport it with
elegance, always.
The beaded bead with tassel are a free project by Preciosa Ornela. I love how it conferes a luxurious look to the whole. It is also fun to make.
I hope to be back soon with news about my Muserie designs.
Upon popular request, I transformed the Sunshine workshop into a video class. You get the full, detailed tutorial with lots of explanations, and access to 8 videos with all the demos you need to make your own pendant - or brooch or toy or ornament - at your own pace.
Browsing my blog for a photo of the Sunshine, I realized that I never posted one of the original Sunshine pendant!
I am not the most tech savvy so it was - and still is - a bit of a
learning curve. But feedback has been very positive. I'm really happy
with my first efforts and hope to do more of this kind of teachings in
the future!
I also listed the pattern for the sweet Fairy Flowers... which was published in the Bead and Jewellery Magazine earlier this year.
* The Muserie Pendulum can be made with what students learn in my "Muserie" Workshop. The first edition was a great success, so with the Guild I will do another Zoom workshop in September, at a more US-friendly time. See the workshop page on my website for other dates when to learn to make an infinite number of designs with warped hexagons!!
**This "Mary" Pendulum is based on my Chess play. There is no pattern for this pendant (yet), but another very lovely pendulum that would look great with this tassel is my Paradox Pendulum.
To encourage you to make a flower, I listed a special bundle of bucolic patterns for US$ 19.- (instead of US$ 53.-) in my shop. This special offer is valid only until the 31st of July, which is the last day of IBW. By then, I hope to have finished the pattern for the Poinsettia flower...
It is not a competition, so any flower you made or make qualifies to enter the draw. I made an edelweiss for the occasion:
There will be Zoom meetings nearly every day of IBW, morning and evening sessions, to suit as many members or even non members as possible. Lots of goodies to win, a special course, etc. Join the International beading week group where we also have our annual rainbow challenge.
As a permanent Ambassador for IBW, I create and make a free tutorial for a special IBW design, every year. This year, it will be something made with these little bezeled chatons:
Warning! Long blog post! Read it when you have a moment to relax, and laugh of my "tribulation report" :D
Now that it has been revealed, I can finally talk about my make for the Beadworkers Guild yearly challenge. Clearly, not one of my BWG challenge beading and planning processes are the same. First time - for the Egypt themed Wesekh,
I had everything I needed in my stash, and made the clasp myself. The next year, I made my Fantasy chess play so it was easy to choose the right colours, although "ivory" is not the same from one brand to the other, and the Czech shaped beads are called "champagne". Past year, I recycled a sculpted bird to create "Peace, astray" because the theme required us to recycle, and evidently this resulted in using beads from stash again.
The only things in common are long hours of work, and the fact that the view of my beading mat would result in some of my beading friends needing extra oxygen or maybe even defibrilation.
This year...
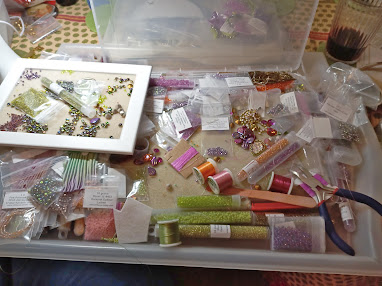
It doesn't show, but I somewhat succeeded to organize my capharnaum: I piled up 3 boards to 'contain' the
colour studies and swatches, instead of everything on the same mat. It was a bit acrobatic,
but in the end it paid: I needed less time to tidy things than for the previous
projects. I nevertheless told my husbest that I need more space (I'll let you imagine his face, haha).
Decisions, decisions
Theme Interpretation
Never before did I hesitate so much in making decisions as for this challenge. I had my very own idea right from the start, but studied a bit before going for it. Reading this article about the exceptional collection of costume jewellery created by Joseff of Hollywood for films and stars didn't help, but it was wonderful to see all the stuff made for Hollywood's big films and stars over the past century.
Bollywood films, which often show beautiful Kundan jewellery worn by
gorgeous actresses in full wedding attire also didn't help. I love it. But didn't want to copy it. Reminiscent of Rajastani royalty, Kundan is the name for the ancient Indian art of stone setting. It dates back to the 3rd century. Isn't that humbling? The craftmanship is amazing, and so clever. Have a look when time allows:
The theme really had me think. I didn't want to make an Indian wedding regalia, which shouts "Maharani" to me; or a piece for a Queen (Victoria or another), it would become an historical/royal theme and, well... for
Cleopatra I already have a Wesekh (made for the Egypt-themed challenge).
What did help, was what Karen Gibson-Brown wrote in the May/June newsletter: "For this challenge will you choose to rub shoulders with ‘A listers’ on
the red carpet of the Hollywood Oscars or will you be heading to the
land of sumptuous silks, spices and Bollywood musicals or, will you
choose a mix of East meets West ?"
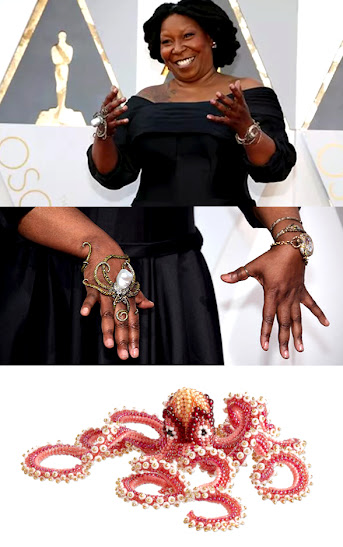
Why do actresses wear jewellery? To be noticed. Why do Jewellers lend their jewellery? To be noticed!
As said, I had an idea already, and that was to make something an actress would want to wear on a red carpet at the Oscars or Golden Globes to
stand out of the crowd - like Whoopi, or an Indian actress in Mumbai.
So I decided to create a shoulder adornment, an Epaulette.
Thetis's Epaulette - BWG 2022 challenge "Hollywood or Bollywood"
Something that would drape from the shoulder down, like saris drape on one shoulder, with rich texture and depth.
Something that would gently dance while moving.
Something to go with my purple dress...
Ear clip and ear hook
A matching ear hook (self-made hook) and an ear clip complete the set. The ear hook is for the left ear, and the epaulette is for the right shoulder (because it is made for a purple cross-over dress, which crosses right over left). Of course, I first made it all the wrong way because saris are mostly worn with the fabric draping down the left shoulder, so I did as much "frog stitching" as I did Saint-Petersburg stich! A real lot!
Making of this set
I had to push
technique beyond boundaries and give in when the beads dictated their
rules. It decided to live its own life early on, developing a unique
"marine life" look. I love the wet sea weed look and the depth of the German cabochons, which is incredible.
Close-up of ear clip with the hook behind it
The colours
This year my muse litterally disappeared
when it came to choosing
colours, and I hesitated a long time between Hollywood (glamorous gold
and
diamonds) and Bollywood (bright colours). I don't dare to sum it all up
but I severely exploded the budget, because I bought a lot of beads and
more beads after making swatches and changing my mind. Here again, the
May/June Newsletter was helpful, although I didn't realize that back when I
read it: in this newsletter the colours of BWG booth were announced, Fuchsia
and Lime. After a serious fight with the muse, I decided to use these colours
rather than the glamorous gold (which my muse still pesters me with,
even now that the challenge is over) AND orange for marigold, because in India, you see these flowers everywhere.
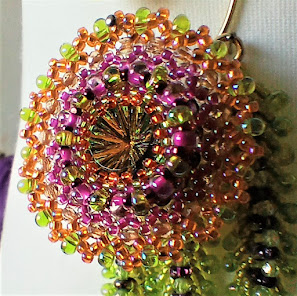
Focal with lacy corrolla
Designing
It looks so simple but was hard. It
needed a lot of thought, problem solving and adapting (letting go)
process. That is what happens when you have an idea (the feathers) but beads want
things differently.
The feathers/sea weed needed 2,5mm fire polished beads! The 2mm and 3mm that I bought
were useless because the feathers would curve in or out,
resulting in a very unwelcome swirl. It was hard to find those rare
little glistening beauties in the right colours. The true2 has provoked less interest in the 2,5,mm and that is a pity, because they're really perfect. I found
lovely colors at Jencel Beads, but she could not send them to Switzerland
and I had to ask a friend in the UK if she'd agree to send the parcel
to me as a gift.
Drop and fire polished beads addition
Technical struggles (self-challenges)
No matter how well I controlled my thread tension, the
feathers still slightly turn in the direction of the first row. It is not
obvious, but enough to not
ignore, so I beaded in mirror half of the feathers.
"Thread management" needs improvement
To add so many beads around the cabochons to obtain a lacy corrolla without ruffles was also challenging. I
wanted to add lots of beads, colour and layers. I used netting,
Huichol, and had to come up with some sort of "back and forth lacy
stitch" to get things straight (and started over many times). Diamond Weave was not part of the work this time, but knowing it helped quite a bit.
First layers of lace wanting to ruffle, of course!
Colour placement
The
German
cabochon shows exactly the colors that I used - green, fuchsia, orange
and orchid. It has amazing depth. Interestingly, it also had a blue
sheen in it which disappeared once the stone was bezeled. I made
many colour swatches. It was not so much "which colour" anymore, but
rather "where to place this and that one. It is impressive how some
colors side by side can "kill" or turn other colours dull.
Thread and weight hassle
The Twin beads and engraved pip beads not only had sharp holes, but their
weight all together was quite impressive. Thread broke. Repairs were made. Solutions needed. I would have loved to make a
more exuberant piece, with longer sea weed (which was planned), but I quickly wondered how
on earth it would remain in place on a shoulder. The words "Nobody will want to wear this" resounded in my head (aka the muse shouting at me)... Well, "earth" was the
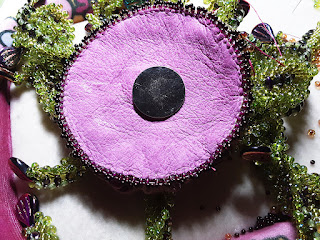
answer: I used "rare-earth" magnets, ultra-thin yet super
strong discs. It will stay in place even on a jacket with these! But of course, when I
received the first lot, they were too weak, and I had to place an order
for stronger magnets, reason why my parcel left for the UK only on 21
March, very close to the deadline!!!
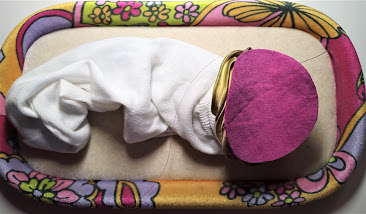
To add the leather to the back of the epaulette, I used a sock to keep the weeds out of the way of the thread.
Extra challenge
I am not a Shibori silk person so this was a great occasion to play with the delightful yet dreaded (by me) fabric. It offers a perfect base, nothing too overwhelming or
bright, yet soft, luxurious and delicate (in a fragile sense). You'd think that I could have been braver with this base. Well, initially I thought about embroidering a soft foam
epaulette. It had to be easy on and off, which it wasn't, and comfy to
wear. It did not offer the look I wanted either. So it is round and domed, backed with leather, and quite the perfect support for the sea weed that pulled so much on the threads. Also, I am very proud of the beaded edges.
Magnets before and after adding leather
The little details
Even though the piece seems relatively medium sized, to have everything in the right place, varying lengths of the sea weed,
drops at different distances from the top, no ruffles, no gaps, etc. was a very complex designing experience. Even the joins between the pad and the weeds (the edging), necesary to keep everything in place and reduce thread sollicitation in the corrolla, are equidistanced. No threads showing. Etc. I started several things over because of just a tiny little detail. Because details matter for a challenge like this.
The photo above is terrible, but you can tell that I'm really happy with it. It has harmony, movement, depth, and smooth sophistication. And the perfect "wet look" thanks to the use of soft glistening drop beads. It is a real jewel in my books.
And it has options. See how the earring and hook look when worn. I love it so much. It can be worn without the epaulette too! And also the clip on one ear and the weed behind the other ear.
The idea of wearing only one earring with an asymetrical dress was French actress Audrey Tautoo's, here on the red carpet in Cannes (when presenting the film "Da Vinci Code"). It was, back then, also subject to loads of attention from the media and fashionistas.
Why the name "Thetis's Epaulette".
Goddess Thetis was a beautiful, shapeshifting sea nymph born by Doris, daughter of the ocean. Her name evokes a flurry of myths, legends and events which have
entertained previous and present civilizations (through plays and books, notably the Iliad),
and which continue to be a source of inspiration for the film industry
in general.
Thetis dipping her son Achilles in the Styx river
An oracle said that her son would surpass his father, so despite her kindness and great beauty, no other God wanted to marry her and she ended up marrying a human. At her marriage, the uninvited - hence upset - Eris, goddess of discord, brought a golden apple, engraved with the words "for the most beautiful". This resulted in the war of Troy where Thetis's son, Achilles, died from an arrow shot in his only weak spot, his heel, there where she had her fingers when dipping him in the magical waters of the Styx.
Voilà!
Thank you for reading me! Please tell me in the comments what you think about this project! I love to hear from you.
While writing this, it rains, and still is very cold over here. But!! On the 26th of January I saw a couple of bulbs bravely pointing new leaves to the sky despite the nightfrost. Wow! It surprised me and made me smile out loud Yay, Spring is on its way: 😊. I also saw catkins past week.
Now if you don't have signs of Spring outside, yours truly made sure that you nevertheless would see something Spring-like this month: Fairy Flowers.
I'm a cover girl again! In the 113th Bead & Jewellery magazine, you will find this pretty project designed to welcome the Spring: geometric Cellini peyote flowers on a lariat. I hope that it will make you smile too!
Fairy Flowers with beaded rope
Fairy Fowers with leather cord
You can wear and make it in many ways. In addition to the blue and rose lariats shown in the magazine, I made a metal-based lariat with just two of these flowers. They are in good company: a Rainbola (free pattern) covers the sliding bead, and a pair of Fandango earrings in matching colours completes the whole. You can also make earrings with the Fairy Flowers. I hope that you will make many!
Vicky Roberts, the lovely editor of Bead and Jewellery Magazine, also
wanted to do an interview with me. I really appreciated collaborating
with her.
Now if it is really special to be a cover
girl, to learn from her pen that I am one
of the most influential beaders in the beading community is beyond expectations. Wow!!
I feel honored, grateful and happy!
Fairy flowers on lariat-style chain
I like to enable beaders and contribute to the evolution of beading. This is one of the reasons why I write blog posts from time to time. So here is a bit more about the lariat.
The Yukka flower was a first warped hexagon (the other is my Trapezino pendant). Because it includes Cellini peyote, it is not obvious that it is one. In the
bridal set shown here, you can see lots of Peppers, 3 & 4 pointed Yukka
flowers and a hairstick with the very first Fairy Flower (02-2011).
Pepper, Fork, and Yukka Flower Bridal set - 2011
Funnily, when I made the Toxic Flowers necklace based on it, I thought that many would easily guess how to make them, so I didn't write a tutorial for it.
Then I made my Jalisco Bangle, another all-increase zig zag, but with a long start. I later gave it to the Contemporary Geometric Beadwork project /volume 1, pp. 214-215), with the hope that a whole team would find ways to take it further. Because to find the right size for a bangle with this technique was quite a challenge.
Toxic Flowers - 2011
Thanks to the CGB team and in particular the immensely talented Claudia Furthner, who created a tiny all-wing, the best starter strip for zigzag beadwork was found.
Jalisco Bangle for CGB (2012-2013)
It's a joy to start new beadwork with it. Making various sizes of bangles is suddenly way less fastidious, albeit
still a bit challenging if it is not for our own wrist.
For that, the paper about Rick Rack sizes and charts that I wrote/drew thanks to the contribution of many other CGB team members is still useful and available for free on my website.
New "pod" designed by Claudia Furthner beaded by moi
Oh and I also developed a little mathematic formula to help planning the number of Delicas needed for the start of a bangle of certain sizes. I gave it to the CGB team during a beading retreat for them to develop further and perhaps it will soon be made available.
Do you remember that Sam Norgard launched a communal project for all beaders to participate in, world wide: the "Black and White together" project? It is becoming a huge portrait of African American bead artist Joyce Scott.
In 2021, Sam launched another communal project called "All colors", also for all to participate. Guess what folks are asked to make? Little flowers, cast off Claudia's pod! You can still participate in this project.
All colors flower
My muse sings: Sam's project will showcase a gazillion star flowers, and they are all mini "Jalisco". Wow!!! She didn't consciously use the Jalisco flower as a base, but still, it was my gift to the CGB project. It is lovely to see it live further. My Jalisco bangle tutorial is a bit obsolete now - I would recommend casting one off of a pod and hope that if you do, you will send me a photo, or tag me in it on Facebook!
B&W together
Now please have a look at this small pattern by Eva Maria Kaiser which uses bugle beads. She made all-wings earlier than me! I do believe that Eva Maria is the mother of many geometric break-throughs without that many of us noticing. If geometric beadwork can lead to design collision as I try to explain in my previous article, Eva Maria is a Master at transforming her work into unique pieces of Art and the original structure of her pieces tends to disappear in the background.
Visit her website: her work is overwhelmingly impressive and beautiful and proof that we have endless design possibilities still awaiting our hands and needles.
Now what can the 4th wow be after all this awesome sauce?
Well, the other day, I discovered that Feedspot, in their "Top 80 Bead Blogs and Websites"
places this blog by yours truly... 14th! Wow!!!! I feel very
honoured. Last time that I looked
at this list, it was somewhere in the 50's, so thank you to all those who
appreciate my articles and let them know that they do! You rock.